If you are into archery, you must be aware of how much practice targets cost. An archer who trains regularly might find purchasing new targets every other week out of their budget. If you wish to save yourself from getting ripped off, learn how to make an archery target at home. It is a fun project that you can perform with your family and friends or even all by yourself.
There are several types of do it yourself (DIY) archery targets. You can make these using objects as common as cardboard, wood box, carpet piece, hay bale, or foam pieces. All you need is your desired target body, a supporting frame, and a back.
Based on the material you choose, the durability of the target varies. Some can withstand lots of abuse for a long time while others last a short time. Find out how to build an archery target with ease following our favorite techniques explained below.
DIY Methods – How To Make An Archery Target?
Learning how to make a homemade archery target with cardboard, hay bale, foam, etc., is quite a fun task. You don’t need to spend a hefty amount on these items. However, the construction difficulty might vary depending on the material you are using.
As mentioned earlier, the robustness won’t be the same for all targets. To find out which ones are the toughest and which are not, refer to the chart below:
| Archery Target Material | Durability | Assembly | Estimated Cost | Ideal Arrow Type |
| Hay Bale | Less | Extremely Easy | $20 to $80 | Blunts |
| Cardboard | Moderate | Extremely Easy | $10 to $20 | Bullet points |
| Carpet | High | Moderate | $50 to $80 | Bullet points |
| Wood Box | High | Slightly Hard | $20 to $40 | Bullet points |
| Foam | High | Easy | $20 to $80 | Broadheads |
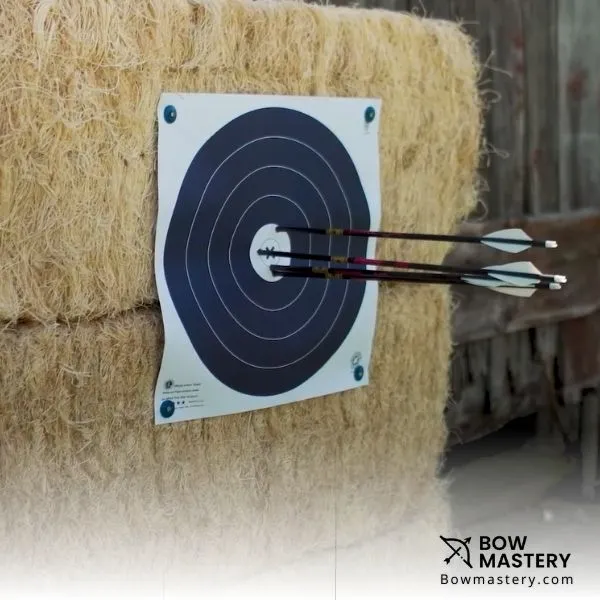
Hay Bale Target
Out of all the homemade target types, this one is the simplest to make. It is ideal for casual shooting activities for recurve, compound, and traditional longbows. If you are beginning archery journey, do check beginner compound bows and beginner recurve bow to find our tested and high quality ones.
Items Needed
- A hay bale
- Measuring tape
- A saw
- Plastic covering
- Some wooden boards
- A target paper
Construction
There are multiple ways to build a hay bale target, let’s discuss each one by one.
Hay Bales Stacked Up
Measure the hay bale and cut it to your desired width and length using a saw. These are prone to crumbling therefore, make sure to wrap these in a plastic covering tightly. Now place it on the group and stack up as much as you want to get the height. Some archers use a single hay bale resting on the ground.
You can either purchase a target paper or print one yourself. Attach it to the bale and you are all set to enjoy target archery. This is the easiest and cheapest way to build your own archery target.
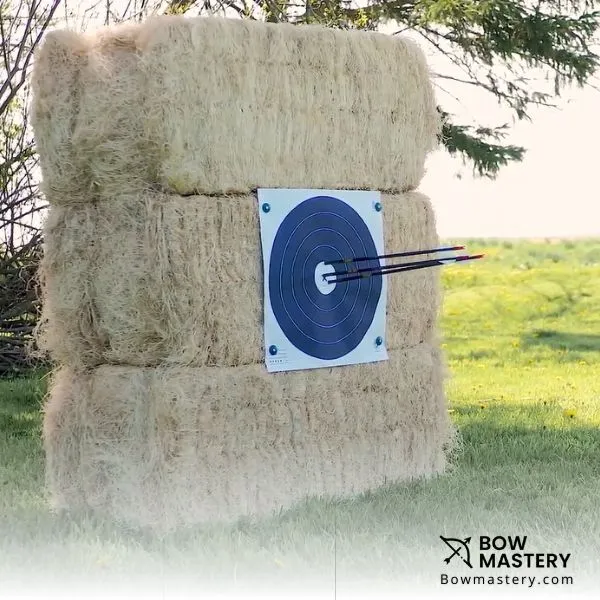
Square Hay Bales With Wooden Frame
For better sturdiness, you can take square hay bales and enclose them in a wooden frame. The overall time required to construct this target is usually less than an hour. If you have a helping hand, the time will decrease even more.
Start by measuring the bales and chop them off according to the size you want. Based on the dimensions of the hay bales, cut the wooden boards using a saw. Since this process requires some technical work, don’t hesitate to seek help if you are not a pro at it.
You can either make a wooden frame from all four sides or just the top and bottom. Once the boards are ready, stack up the hay bales and secure them in the frame. In the middle of the bale, you can either attach a target paper or any animal’s cutout.
This type of hay bale archery target is a bit more durable than the one stacked without a frame.
Pros
- Most inexpensive option
- Extremely easy to construct
Cons
- Attracts bugs
- Can disperse if not covered properly
- When loose, the arrow can penetrate till the fletching
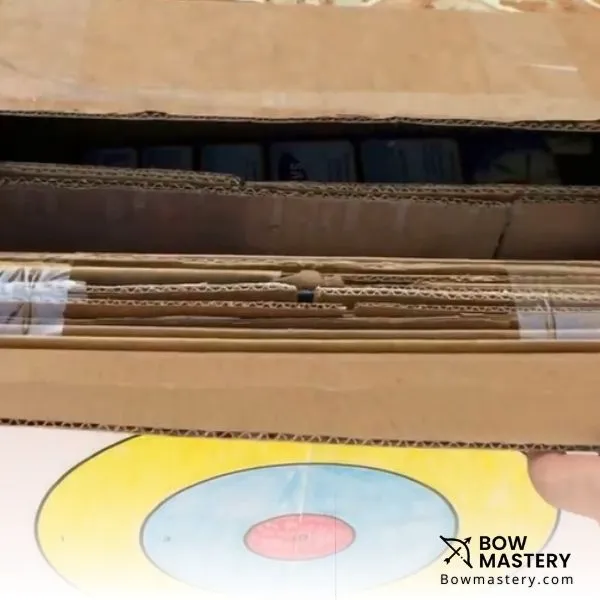
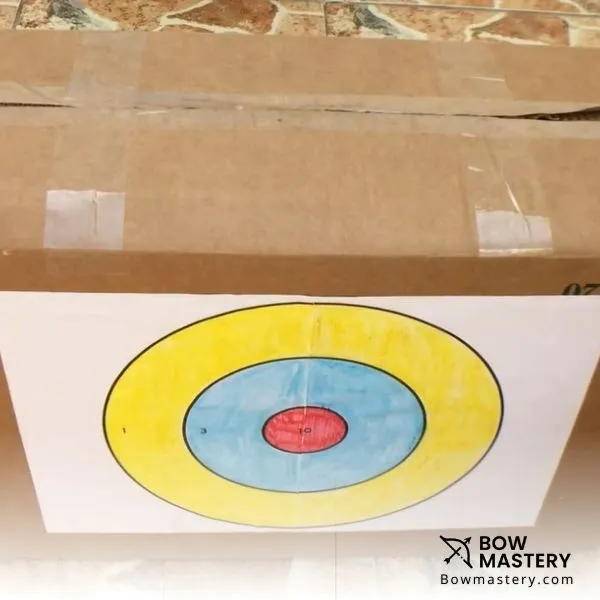
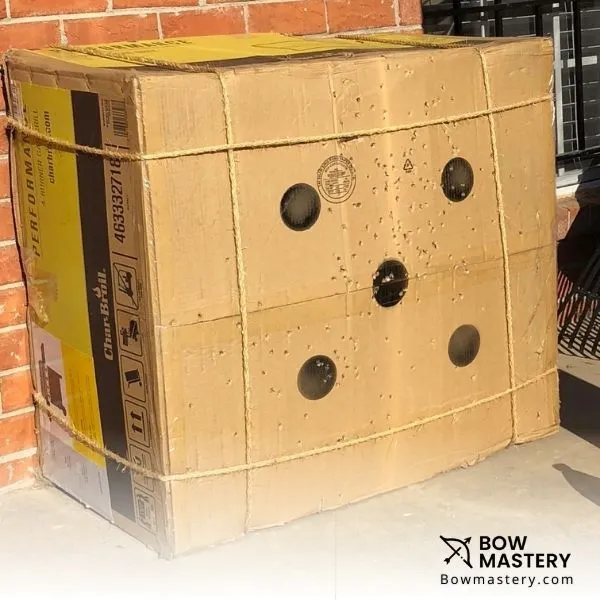
Cardboard Target
Compared to the hay bale targets, these are slightly more durable. If you wish to shoot arrows without actually damaging them, cardboard targets will work well – Learn more about parts of an arrow. These are super easy to make and take no more than 30 minutes.
Items Needed
- Cardboard box
- Some extra cardboard
- Tape
- A target paper
Construction
Grab a decent cardboard box of the size you like. Measure the length of the box and cut some more cardboard to fit in the main box. This will provide a solid backing to hold the arrow as you shoot. You will need several pieces of cardboard to fill the inside of the box.
Tape the pieces together and stick them to the inside of the box using glue. You can use a good couple of cardboard pieces on both sides and random small pieces in the middle for sturdiness.
Print out the target paper according to the box size and paste it. Make sure to paste a target paper on both sides of the box. This will provide you with more room for shooting the arrows whenever one side gets damaged to an extent that it can no longer be used.
Pros
- Portable archery target
- Easy to make
- Holds arrows
- Doesn’t move very much as the arrow hits
Cons
- Not suitable for long-term use
- Unsuitable for broadhead arrows
Carpet Target
Do you have an old carpet laying around? Why not turn it into a durable archery target? The process can be a little more tricky than hay bale and cardboard targets but will offer superb robustness and longevity.
Items Needed
- Old carpet roll
- A wooden or any treated board
- Four threaded rods
- Nuts and washers
- A target paper
Construction
First of all, cut the carpet into rectangular pieces measuring 3 to 4 feet long and 1 to 2 feet wide. You can cut as many pieces as you want. Make sure you have enough pieces that when you pile up them all, you get the desired target height.
Begin with drilling holes in the wood piece so that it can fit the threaded rods. Secure the rods with washers and nuts. Now place the rectangular pieces of the carpet in the space between. Stack up to your desired height.
If you want, you can print out a target paper as large as the target is and attach it. A target paper helps to train yourself for better shots with accuracy.
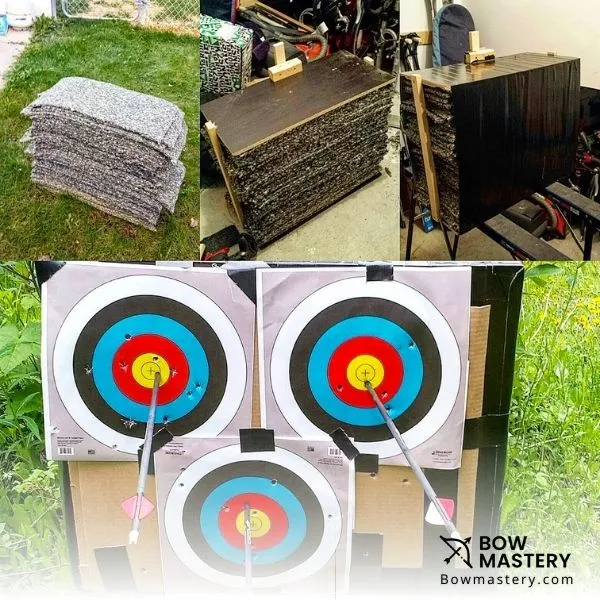
The best thing about carpet targets is that these are quite affordable to make and last a surprisingly long time. If you have an old carpet in your home, you only have to pay for very few items and it cuts your cost significantly.
Pros
- Holds arrows without any issues
- Lasts incredibly long
- No hard work needed for construction
Cons
- Might not be appealing
- Carpets might grow mold if left in the rain or outdoors
- Though easy but consumes a lot of time to make
- Could be difficult to transport if large in size
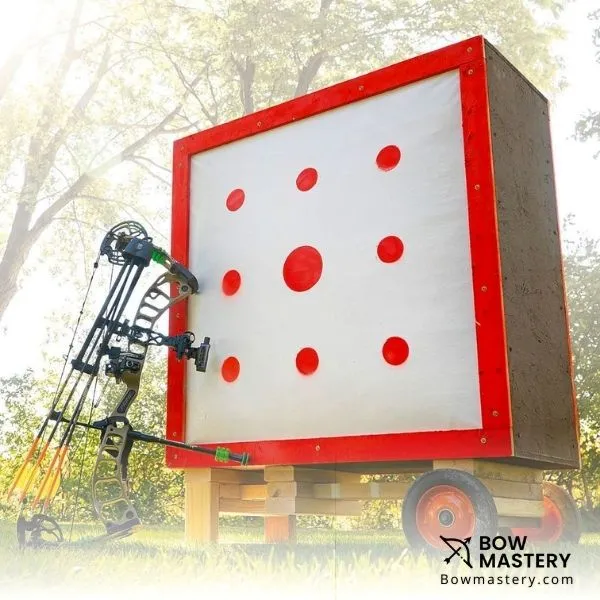
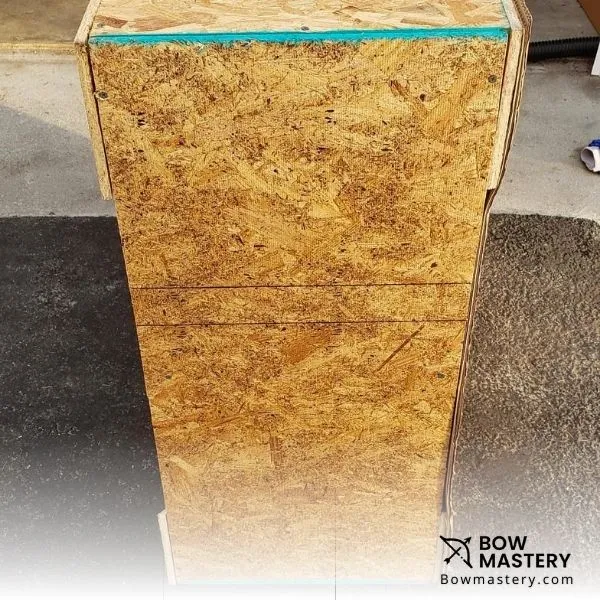
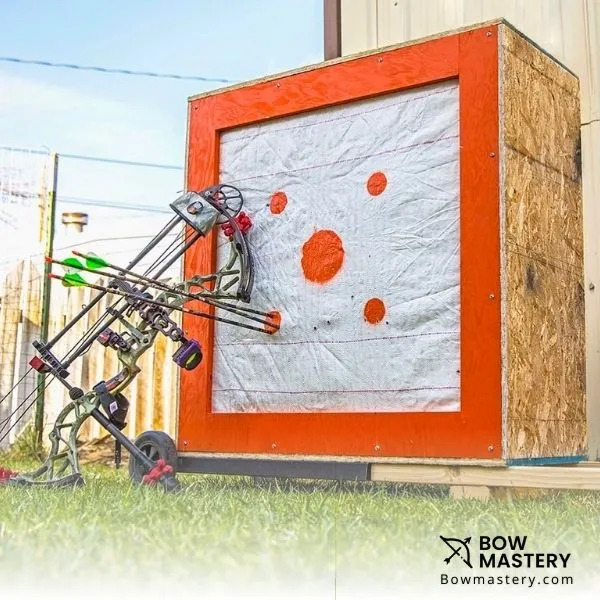
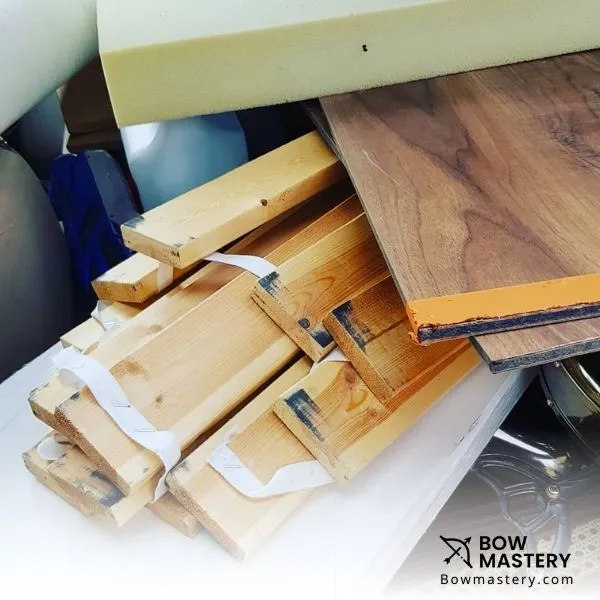
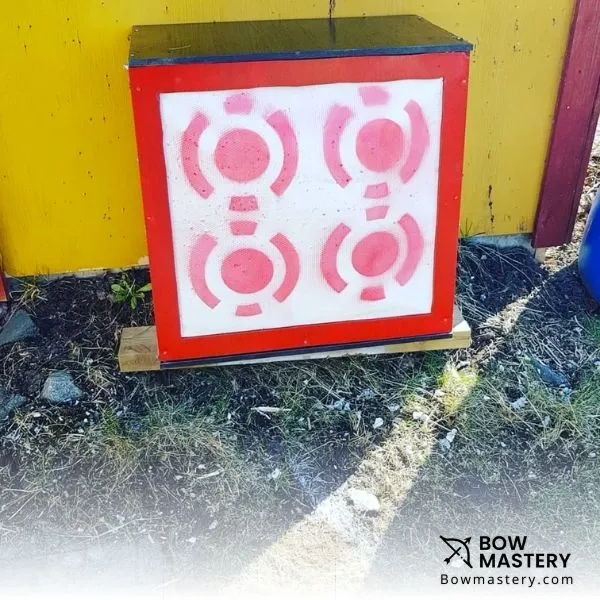
Wood Box Target
If you need an archery target that accompanies you for years, you will need to do some hard labor work. Wood box targets could be slightly hard to make and need lots of labor work.
While it may look expensive but is actually extremely affordable since all it will be made of includes scrap materials. Even if you go buy new materials for this target, the maximum it will cost you is $40.
Unlike other homemade archery targets, you won’t have to remake these every week or month. Wood box targets will live a minimum of one year will regular training activities.
Items Needed
- Plywood pieces
- Plastic pallet wraps, wool, net, old clothes, etc.
- Old grain sack, or tarp
- Staple gun
- Deck screws
- Spray paint
- Wood paint
Construction
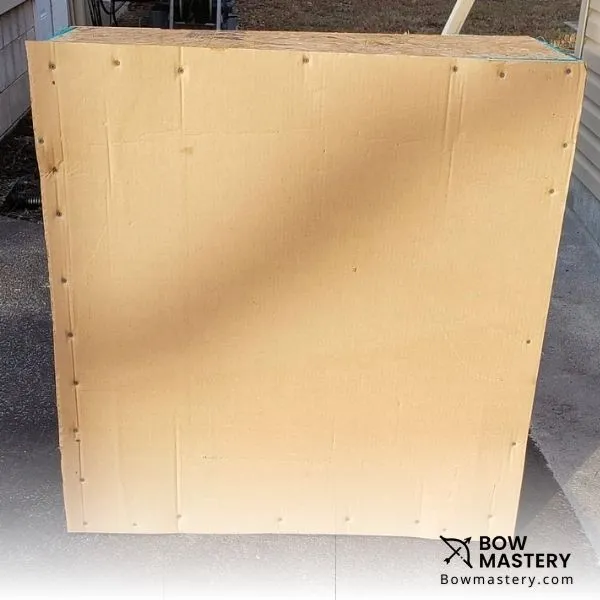
The first step will be to cut out the plywood pieces according to the size of box you want. Screw holes in the wood to bring them all together and make a sturdy box. Make sure to cover all sides with plywood and leave the top part opened. Paint the box with any color if you want and if it comes under your budget.
After you have constructed the box, use the tarp or any scrap banner (plain) to cover the face. Make square borders with wood around it or simply spray paint and make a couple of dots on it as target points.
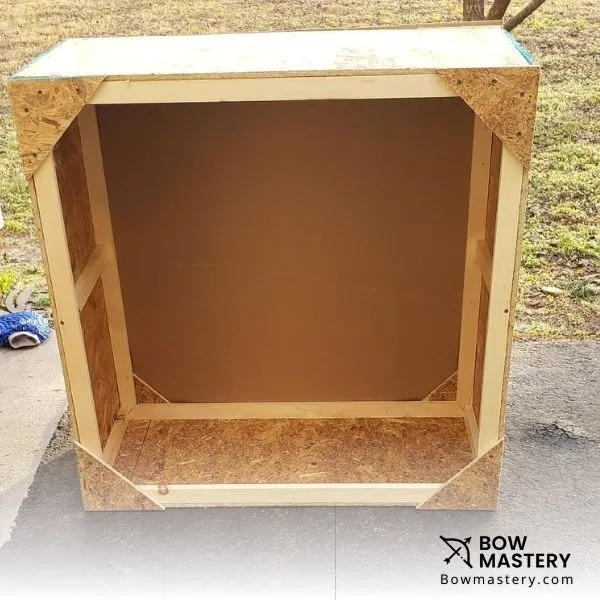
Now, stuff the box with plastic sheets, wool, nets, old clothes, blankets, or anything you have. One downside of using clothes is that they can grow molds. The best and most affordable choice is an industrial grade cling wrap.
Once it is completely stuffed, cover the top with the plywood sheet.
Pros
- Very solid
- Doesn’t damage arrows
- Easy maintenance
Cons
- Very heavy
- Needs a bit of hard work to construct
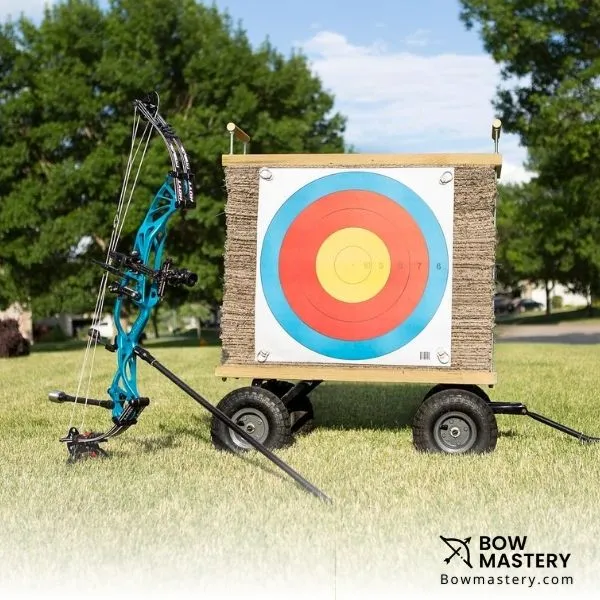
Foam Target
Another amazing archery target choice for excellent durability, the foam targets are extremely durable and take only an hour or two to make. These mats are often known as puzzle mats and are quite affordable.
Items Needed
- Foam mats
- A few plywood pieces
- Threaded rods
- Nuts and washers
- Lumber
- A target paper
Construction
You can either purchase the mats of your desired dimensions or cut them accordingly. Drill holes on all four sides of the plywood and pass threaded rods through them. Stack up the foam mats on the board until it reaches your desired height.
Place the second plywood piece on top of all the mats and press it down. Cover the top with the wood and tighten it with nuts and washers. This will secure all the foam mats and prevent them from falling out.
Finally, print a target paper and stick it on the face of the target.
Pros
- Super easy to repair
- Short construction time
- Withstands all weather conditions
- Suitable for broadheads and field point arrows
Cons
- Foam can rip after a long time
Conclusion
When you decide to learn how to make an archery target yourself, there are multiple factors associated with it. For example, you should have the right tools (if needed) and skillset for the construction.
A homemade archery target is a lot more affordable and lasts longer than ready-made ones. The max you can spend on everything including the materials is $80 to $100.
Frequently Asked Questions (FAQ’s)
Archery dates thousands of years back but the most recent people to first perform archery were the Ancient Egyptians. During 3000 B.C., they used to perform archery for warfare and hunting.
Be it store-bought or homemade, foam archery targets are ideal for broadheads. Unlike other targets, foam dulls the broadheads minimally and extremely slowly.
Related Guides
- How To Change Draw Length On Compound Bow?
- How To Measure Bow Draw Weight?
- How To Adjust Draw Weight of A Bow?
- What Are Parts of An Arrow?
- What Length Arrow Do I Need?
- How To Measure Arrow Length?
- How Far Can A Compound Bow Shoot?
- How Far Can A Crossbow Shoot?
- What Are The Types of Bows?
- How To Measure A Recurve Bow String?
- How To Aim A Recurve Bow?
Leave a Reply